Working with Layers
Paint.NET uses "layers" to form a composite image. Imagine these layers are a stack of transparent slides. Each slide can contain a separate element which forms part of the overall image.
Paint.NET displays the stack of layers as if it was viewed from above. Thus, the order of the layers as shown in the
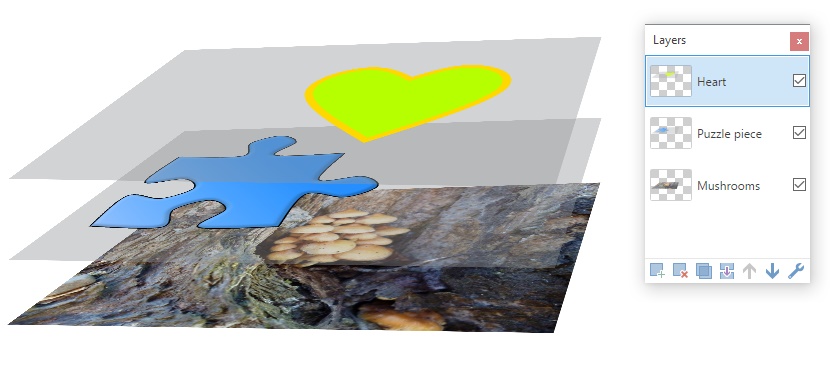
If this image were viewed in Paint.NET the image would look like this

The Active Layer
There is always one active layer. It can be identified by the highlighting in the
Note
It is important to understand that drawing operations only affect the active layer.
The active layer is always highlighted in the
It is easy to shift the active layer status from one layer to another. Simply click on any layer's name in the
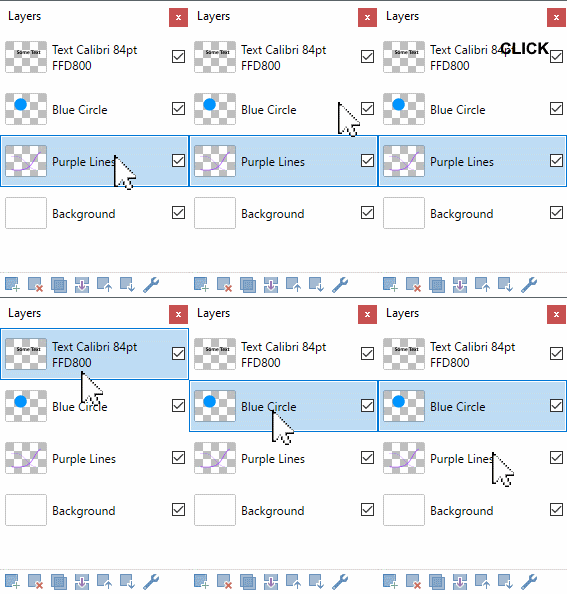
Only one layer may have the active layer status at any time.
Note
Assign any layer the active status by clicking on the layer in the
The Active Layer + Opacity
Layers can have their own opacity setting. Opacity is applied to every pixel in the layer, so it acts like layer-wide transparency setting.
To adjust a layer's Opacity setting, highlight the layer in the
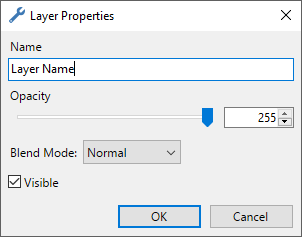
Opacity or Alpha values range from 0 (completely transparent) to 255 (completely opaque). To change the value, click and drag the slider control or type a new value into the numerical value box.
A demonstration of layer opacity can be seen below (Layers and Opacity).
The Active Layer + Blend Modes
Layers can have their own blend mode. The blend mode dictates how the layer is merged with lower layers when the image is composed.
Like Opacity, Blend Modes are applied to every pixel in the layer.
To change a layer's Blend Mode, highlight the layer in the
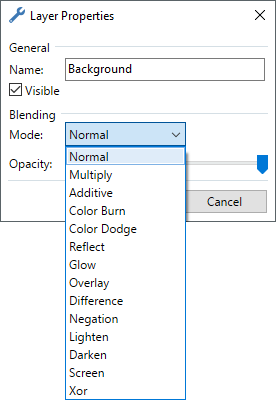
A new Blend Mode can be selected from the drop-down list. Click on a new Blend Mode to apply it to the layer.
The Active Layer + Visibility
Layers can have their visibility toggled on and off. There is a checkbox beside each layer in the
If the checkbox is ticked ☑, the layer is visible and will be included in the composite image when it is assembled. If checkbox is unticked ☐, the layer will not be visible and will be excluded from the composite image.
A layer which is not visible still forms a part of the image when it is saved in the *.PDN format.
To change a layer's visibility, click the checkbox beside the layer in the

Tip
Access the active layer's properties (name, visibility, blend mode and opacity) via the properties dialog. Open the dialog by pressing
Layer Order
The order which layers appear in the
Layers can be moved by highlighting them in the
Tip
New to Paint.NET is the ability to reorder layers in the
Pixels and Transparency
Each layer in a Paint.NET image is composed of pixels. Pixels contain both a color and an alpha, or opacity, value. Paint.NET uses a technique called alpha compositing to display a layered image on a standard computer monitor.
In Paint.NET, Alpha values range from 0 (completely transparent) to 255 (completely opaque). Other software may refer to this range using 0% through to 100% but the idea is the same.
If a pixel is transparent or partially transparent, then pixels from layers lower in the stack will show through to some degree.
As transparent pixels cannot be displayed on a computer monitor, Paint.NET uses a gray and white checkerboard pattern to give a visual clue to transparency.

When this pattern is seen, it indicates that this part of the image is transparent.
Tip
The checkerboard pattern denoting transparency is not a part of an image and will not be seen outside of the Paint.NET editing environment.
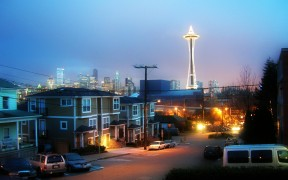
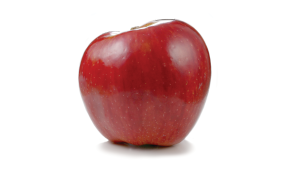
For the following discussion, these two images will be used.
Example - Layering
Here the white background has been removed from the apple image.
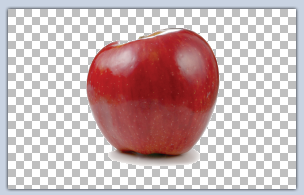
The checkerboard pattern shows the transparent areas surrounding the apple.
If the apple is placed above the Seattle photo in the layer stack, parts of the second image show through.
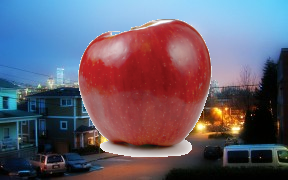
Layers and Opacity
In addition to the transparency information (Alpha value) associated with each pixel, each layer also has an associated opacity value. Consider a layer's opacity setting as an additional Alpha amount applied to all the pixels in the layer.
Example - Layers and Opacity
If the top layer in the previous example has its opacity progressively diminished from 255 down to 0, we get the following set images:
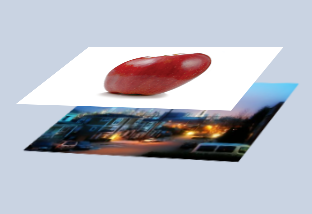

Top layer at opacity:255 (aka 100% or completely opaque): The apple picture obscures the cityscape.
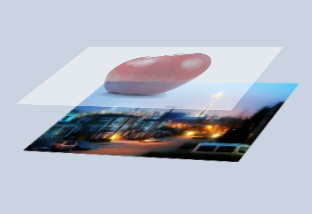
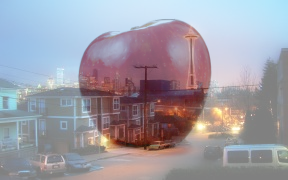
Top layer at opacity:128 (about 50%, partially transparent): The picture of Seattle is partially visible, even through the apple itself.
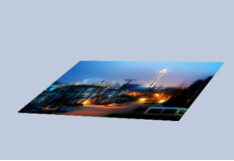

Top layer at opacity:0 (0% or completely transparent): The picture of the apple is not visible at all. Consequentially the cityscape shows through as if the apple layer was not present.