Levels 
Ctrl + L
The

The most common adjustments performed using
The white point of an image is the brightest color that appears in the image. Conversely, the black point is the darkest color that appears in the image.
The grey point represents the average color across the entire image and is only found on the right-hand side (Output) of the dialog.
Each of these color points of an image may be adjusted independently using
Interface
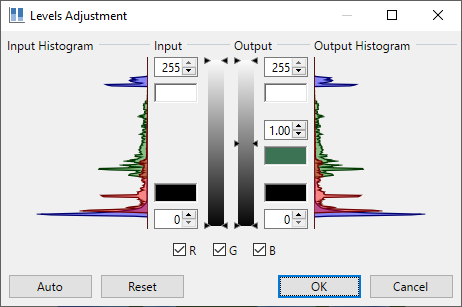
As seen in the dialog above, the
On the left side, there are two color swatches, one white and one black, each with a numeric representation (255 for white and 0 for black). These indicate the input white and black points.
On the right-hand side, three color swatches appear: one each for the output white and black points and another for the output grey point.
These colors can be adjusted using the numeric inputs, the slider, or by double-clicking on the color swatch itself.
The white point on the left-hand side (Input) is the control that when adjusted becomes the white point on the right side (Output). When the adjustment of the white point is performed, colors in the image as bright or brighter than this color will be darkened to be equal to the output white point. The same process adjusts the grey and black points.
If the output grey point is adjusted to be slightly brighter (move the middle slider up or increase the numeric value), it causes the overall color of the image to be brightened. Whites and blacks in the image are not affected.
Example

The original image

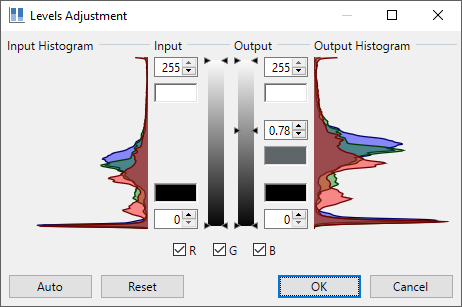
The output grey point of the Levels is adjusted to brighten the image

The resulting image
With
When the output histogram is weighted toward the top of the scale, the image will become brighter. If the black point is raised to achieve this, The image will become brighter and more washed out. If the gray point us used instead, the brightened image will retain more contrast.
Compressing the histogram to a single peak, will result in an image with very low contrast.
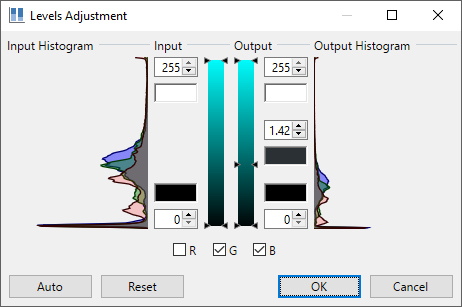
Up to this point, all adjustments have been performed on all the color channels (Red, Green and Blue). By using the R, G, B ☑ checkboxes individual channels can be adjusted separately or in pairs.
Example

The original image

The gamma has been adjusted for the green and blue channels at the same time, causing the level of cyan in the image to drop overall, which accentuates the red of the image

The resulting image